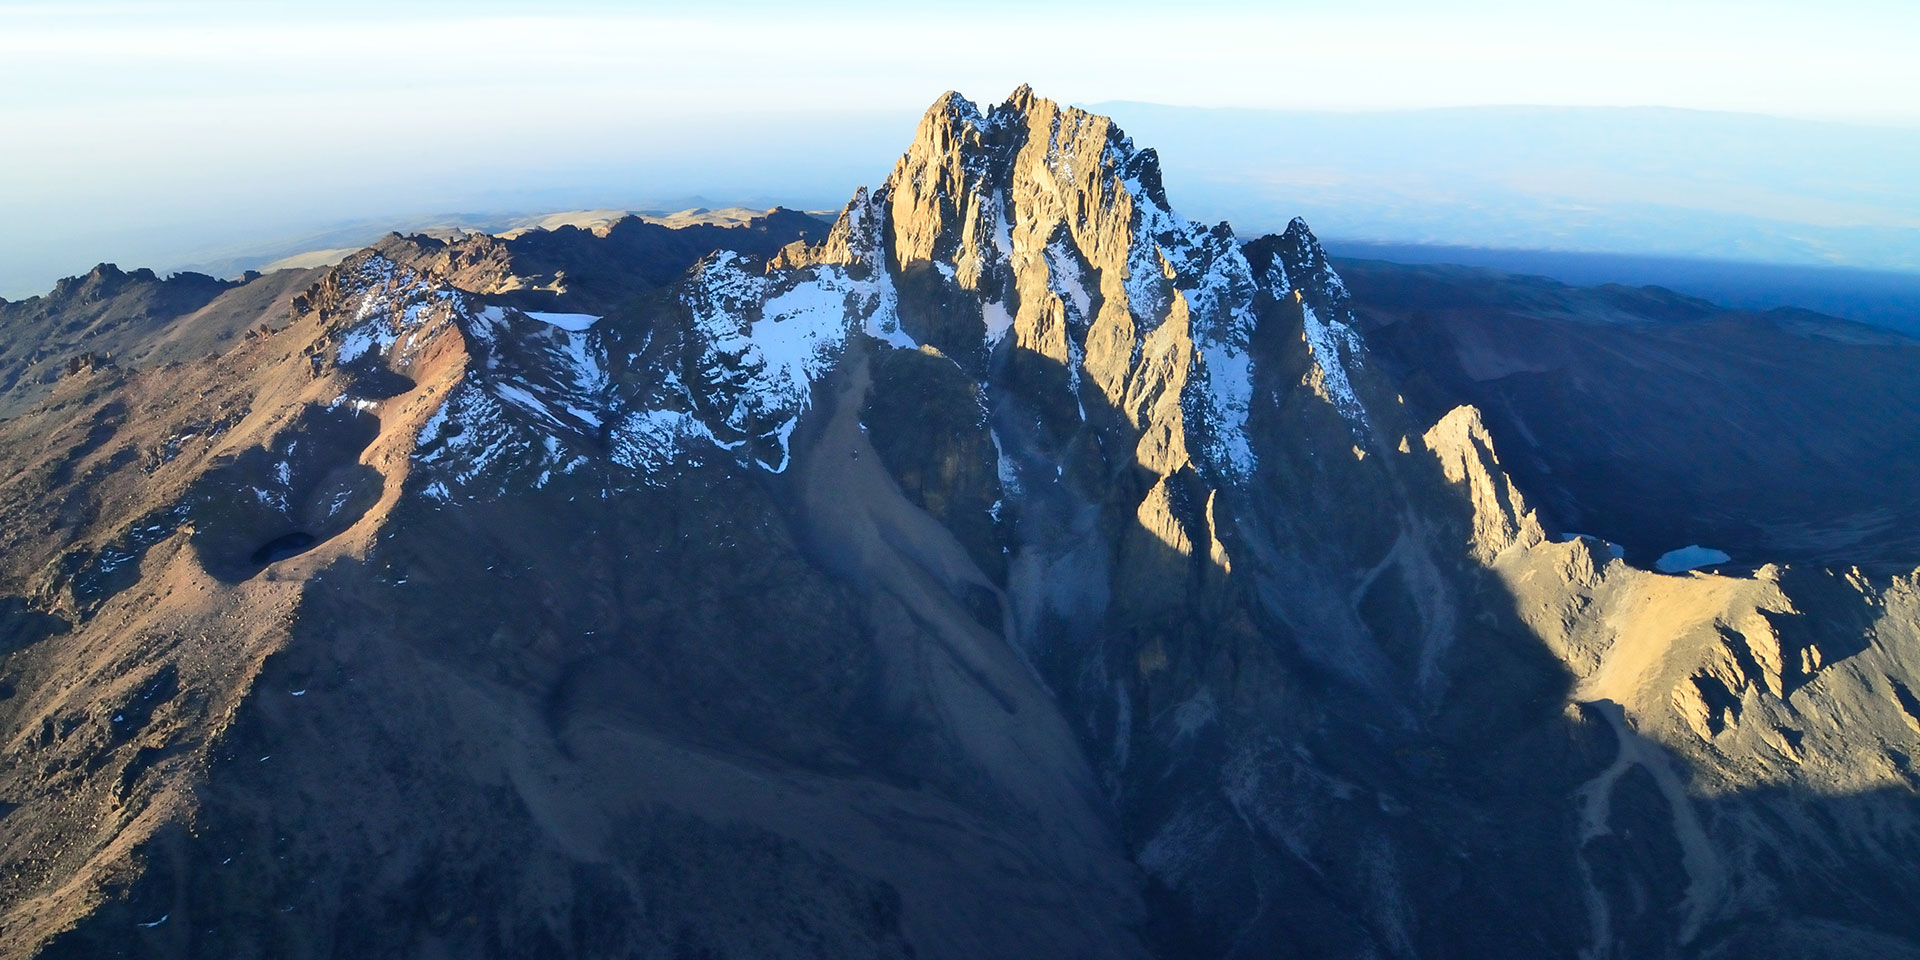
Mt.Kenya is the highest mountain in Kenya, and second-highest In Africa, after Mt. Kilimanjaro. The mountain commands a magnificent tower at an elevation of 5199m above sea level, with three discernible peaks – Batian, Nelion and Point Lenana. A lot of climbing enthusiasts and tourists have a life ambition to tackle this mountain challenge.
Preparation Tips
Mountain climbing is classed as an extreme sport. In that regard, special precautions on health should be taken.
Health checks
It’s highly recommended for every aspiring climber to have an appointment with a health professional at least 4-6 weeks before the scheduled climb.
Anyone with a heart ailment is advised to seek the opinion of a heart specialist before attempting the climb.. The change in altitude can induce symptomatic vomiting and nose bleeding, and in extreme cases, death. Kindly get an overall assessment of your health before commencing a climb.
Physical fitness and diet
There are a few activities an aspiring climber ought to do before a climb. Many first timers underestimate the mountain, and this leads to problems. Physical fitness is a vital issue – most of the climb will be achieved through personal efforts. In the few weeks to the climb, take short hikes with increasing frequencies. Interchange the short hikes with running intervals to increase your heart rate and lung capacity. On the hikes, carry a moderately loaded pack on your back, maybe 5-10kgs, to increase stamina.
Other cardiovascular exercises like swimming and rowing are also very good in building up breathing and lung capacity.
Diet is equally important. A diet rich in carbohydrates and proteins is necessary. Long term carb foods – like cassava, millet, and sweet potatoes are good for the build up to the hike. On the actual climb, climbers are generally apt to use short term carbs, like rice and pastas. In addition, a lot of water and other liquids should be taken to avoid dehydration on the climb – it’s fatal.
Travel documents
Depending on one’s nationality, prior travelling arrangements need to be taken, before the hike. For instance, while climbers from the East African region virtually require no paperwork apart from the basic identity card, climbers from the United States would require a visa. However, these are easy to acquire on arrival at the airport at a modest fee around $20. Other travel arrangements include yellow fever vaccinations for the relevant countries. Kindly seek up to date information from your travel agent.
Equipment
There is need for strong and comfortable hiking boots. A climber is encouraged to acquire such boots a few weeks to the climb, so that by the time of the climb, there is less likelihood of developing sore blisters during the climb. Warm clothing is necessary, and possibly weather-proofed clothing. On the hike, expect intermittent change of weather, and thus proper clothing is necessary. Thick, warm socks and gloves to combat frost bite. Sun glasses to minimise sun and snow glare, especially on the upper part of the mountain. They also help reduce eye fatigue.
Trekking Crew
A trekking crew usually consists of guide, a capable cook, porter for the cooking gear plus a personal porter for every trekker.
It is necessary to acquire the services of a professional and experience guide, for two reasons: (a) They will regulate your pace, and draw on their experience to diagnose altitude sickness symptoms, and make other critical decisions. (b) Their knowledge of the flora and fauna will keep the hike animated and interesting.
Most guides on the mountain insist on a prior meeting and some short crash course of the bare expectations to have on the prospective climb. They’ll update you on real time challenges to expect, especially on weather patterns, as opposed to reading print literature on the issues. They have more skilled advice on appropriate gear and clothing.
When you meet the crew, remember to ask for their registration details with the Kenya Wildlife Service, and mountain guide pack from Mt. Kenya National Park.
Best Routes for Climbing Mount Kenya
There are several routes to achieve a safe and successful climb on the mountain. Climbers, with the help of their guides, should take special care taking in account changes routes due to the shrinking glacier cover.
Chogoria Route
This route starts at Chogoria Town, on the eastern side of the mountain off Embu-Meru Road. It’s has been tagged as the longer route, but rewards the climber with the most beautiful views along the route. It was opened in the early 1920’s by explorer Ernest Carr, who made a vehicle track from Chogoria to the moorland.
The first part of the route form Chogoria Town is covered in a vehicle, preferably a versatile off-road truck, up to the first camping grounds.
There are camping grounds on the road head. Water is available from a stream at the grounds. Mintos Hut (4300m) is an excellently sited hut on the plateau overlooking lake Michelson around 300m below. A few minutes South-East of Mintos Hut to the edge of the ‘Temple’, there is Nithi Gorge – a river valley with spectacular views.
From Hall Tarn, the trails climbs to the Austria Hut, a bare-minimum shelter at 4750m, via Square Tarn and the Tooth Col, the round the head of the Hobley Valley. If your guide is worth his weight in gold, he should effortlessly point out these features and names of the points as you advance.
Sirimon Route
This is the easiest and most scenic route from the northern side of the central peaks – Batian, Nelion and Lenana. This route branches off the Nanyuki-Meru Road, at the 15km point. It’s the favourite route, for several reasons:
- Its position on the North Western side of Mount Kenya makes it drier than other routes for most of the year, as the area generally experiences less rainfall.
- On the route, there are two permanent camps – Old Moses at 3300m and Shipton’s Camp at 4200m.
- From the Shipton camp which is situated in the Mackinder valley, you’ll enjoy a panoramic view of all the main peaks including Terere and Sendeyo – two parasitic vents of the main peaks.
- The route has plentiful water, so refilling packs and general use is not a problem.
- The climber gets the unique opportunity of crossing the equator twice – at Nanyuki, and on the way to Old Moses Camp.
Naru Moru Route
This is the shortest route to the peaks, through the Teleki Valley. It’s important to note its usually filled with hikers, due to obvious reasons – short distance, and less twists and turns. However, this route has some difficult sections, notably a steep marshy section known as the Vertical Bog. This part is reached one hour from the Met Station, expect to use at least two hours to cover it.
At an average three to four hours from the Met Station, the path reaches the crest of the ridge overlooking Teleki Valley, at 4000m. The path then meanders along the right side of the Teleki valley, going up steadily for a short distance, then gradually descends to pass Naro Moru stream to Mackinder’s camp at 4200m. The distance between Met Station and Mackinder’s Camp is approximately five to six hours of steady hiking. A further four-hour walk one reaches the Austrian Hut, and another hour hike gets you to see point Lenana, 4985m.
Burguret Route
This route also rewards the climber with beautiful camping grounds, and awesome views. It starts at the Mountain Rock Hotel, and cuts through the forest past Gathiuru Forets Station to an indistinct road head at the end of the plantation, 2500m. The trail continues to Elephant Camp at around 2600m.Expect to trek though the cool, and amazing Tropical rainforest with its tall trees and endless canopies till you get to the more open Hagenia-Hypericum Zone 2860m. Further past, you get to the Heath Zone, and you get the first clear glimpse of the peaks. There is a good campsite, just past the castle called ‘Kampi ya Farasi Camp’.
From the camp, the trail turns left and it’s a steep climb out of the valley. The ridge turns right again, and it’s a tortuous walk on rocky ground round the hill. The trail once again turns left via the Hausberg Col and Oblong Tarn to Mackinder’s Valley. It then descends to Shipton’s Camp, 4200m.
Mount Kenya Summit Circuit Of The Main Peaks
This is strictly for the seasoned climbers, as it’s not really a single-peak-climb, but a calculated circuit hike of all the peaks.
It starts at Shipton’s Camp and ascends directly to Kami Hut, following the sandy scree to Hausberg Col and drops steeply to Oblong and Hausberg Tarn. At this point, the climber replenishes food and water bottles and takes a rest for the final dash.
Then the path leads straight between the two tarns to reach the foot of a scree slope that climbs steadily up to reach a col with Nanyuki Tarn as its base. The trail swings left, descends to pass below Arthur’s Seat, and trends to reach Nanyuki Tarn. Then turns to the left of the tarn, climbs a short rocky section and crosses a small col to reach Hut Tarn, the turns right to reach Two Tarn Hut, at 4490m.
The trail then keeps to the right side of the tarn, climbs a boulder to reach a scree overlooking Teleki Valley. It the drops through a steep slope to join Mackinder’s Camp, at 4200m.
From this point, it’s a trek northwards to meet a path that links to the American Camp, and the path to Austrian Hut can be seen on the opposite side of the valley, snaking its way up the large, steep scree slope. Follow the path round the head of the valley. You’ll need to cross a boulder scree and a large buttress. Trend steeply upwards to reach Tooth Cor. From this point, it’s possible to see down into George’s Valley and Hall Tarns.
The path then drops down to Square Tarn, follows cairns trending left and downwards towards Simba Tarn. Keeps dropping steeply to the lower Simba Tarn, and cuts across to the Shipton’s Camp.
Basic tenets to observe while on the climb
Well, there’s a universal call to preserve and protect the environment. On a climb up Mt. Kenya, climbers have to observe some basic tenets:
- During the hike, in the instances of open fields with no clear trials, spread out and trek in wide formations to avoid creating new trails. New trails encourage water run offs in rainy seasons – more soil erosion.
- In cases of clear trails, climbers have to walk in a single file, keeping to the trail. Hence, no new trails.
- On camping and resting points, absolutely no dumping of litter – plastic water bottles, food wrappings, or discarded clothing. Roaming wild animals ingest this trash, and eventually die from it.
What to expect on your first climb
Well, different climbers have different experiences, especially on their first climb. To take the cream of the long list of what to expect, here’s a few pointers:
- Expect long hours trekking over rocky, barren land – aching calves and sore feet is a possibility.
- It’s freezing at night, so there’s a need to prepare for overnight temperatures well below freezing point – invest in a good quality sleeping bag.
- The abrupt gain of altitude may bring unforeseen health challenges despite decent level of fitness – expect throbbing headaches and other symptoms of mountain sickness. Listen to the guide, take enough liquids to stay hydrated and keep a sensible easy pace.
- It’s a great experience for bird watching enthusiasts. Arm yourself with a good camera and a pair of binoculars.